Well, I finally finished!
For my birthday, mid March, my wonderful wife bought me some bags of bricks. Unfortunately I was too dumb to take photos of all the prep work as I was just having way too much fun putting it together!
These things are so awesome and I've got another kit to go yet (the Weathertop type one).
It takes a bit of practice to get the hang of using them and I haven't done a particularly good job of it. The walls are a bit crooked and there are some ugly gaps. Still, I think it came up quite well in the end! There were several times I dropped bits and had to re-do things as blocks went breaking here, there and everywhere. Once I finish the Weathertop one I think I'll just order a whole bucketload of bricks and go freestyle =)
Anyway, here is the test fit of the different sections.
And here's the same structure after adding some ruiny bits to the tops of the smooth walls.
I wanted a sort of bluestone look to the ruins so I had a look at the bluestone bricks we have around our wall heater. There is an underlying brown tone, then a blue-grey colour followed by some lighter grey drybrushes. Hopefully it will distinguish it from the board while still looking as though the stones came from the same area.
Here it is all looking muddy and blue-grey...
With one more coat of blue-grey you can see the base colour I'm going for.
And now there's another drybrushing of grey...
Not sure the picture shows it, but the left hand side has a lighter tone than the right.
And this is as above, but showing the last highlight layer on the left compared to the right. In all it was a spraypaint black, paint all brown, then heavy drybrush blue-grey, then a still pretty heavy drybrush of medium grey, then a lighter drybrush of light grey and finally a tiny brush of almost white. It sounds like a lot but takes a lot longer to dry than paint in this weather! Plus, because you're not worried, like on a miniature, about perfection it's really pretty simple and quick with a big brush!
Next I had to get the board ready. I put it together loosely, then marked off where the building was. Smeared glue all over the rest of the board, sprinkled sand over that and some small stones then waited a day for it to dry.
To cover up one of the larger cracks I decided to use a vine (gratefully given to me by my brother). But how does a vine grow in my wasteland? I needed a water source so added a well in the courtyard. Then I did a big heavy black paint over the whole thing.
Next step was some simple drybrushing of the sand in just the grey colours (no browns or blue-greys). After that was dry I reconstructed the walls, applied a ton of glue and propped it up ready for another day of waiting.
When that was dry I needed to add some sand around the base of the wall where I had gaps...
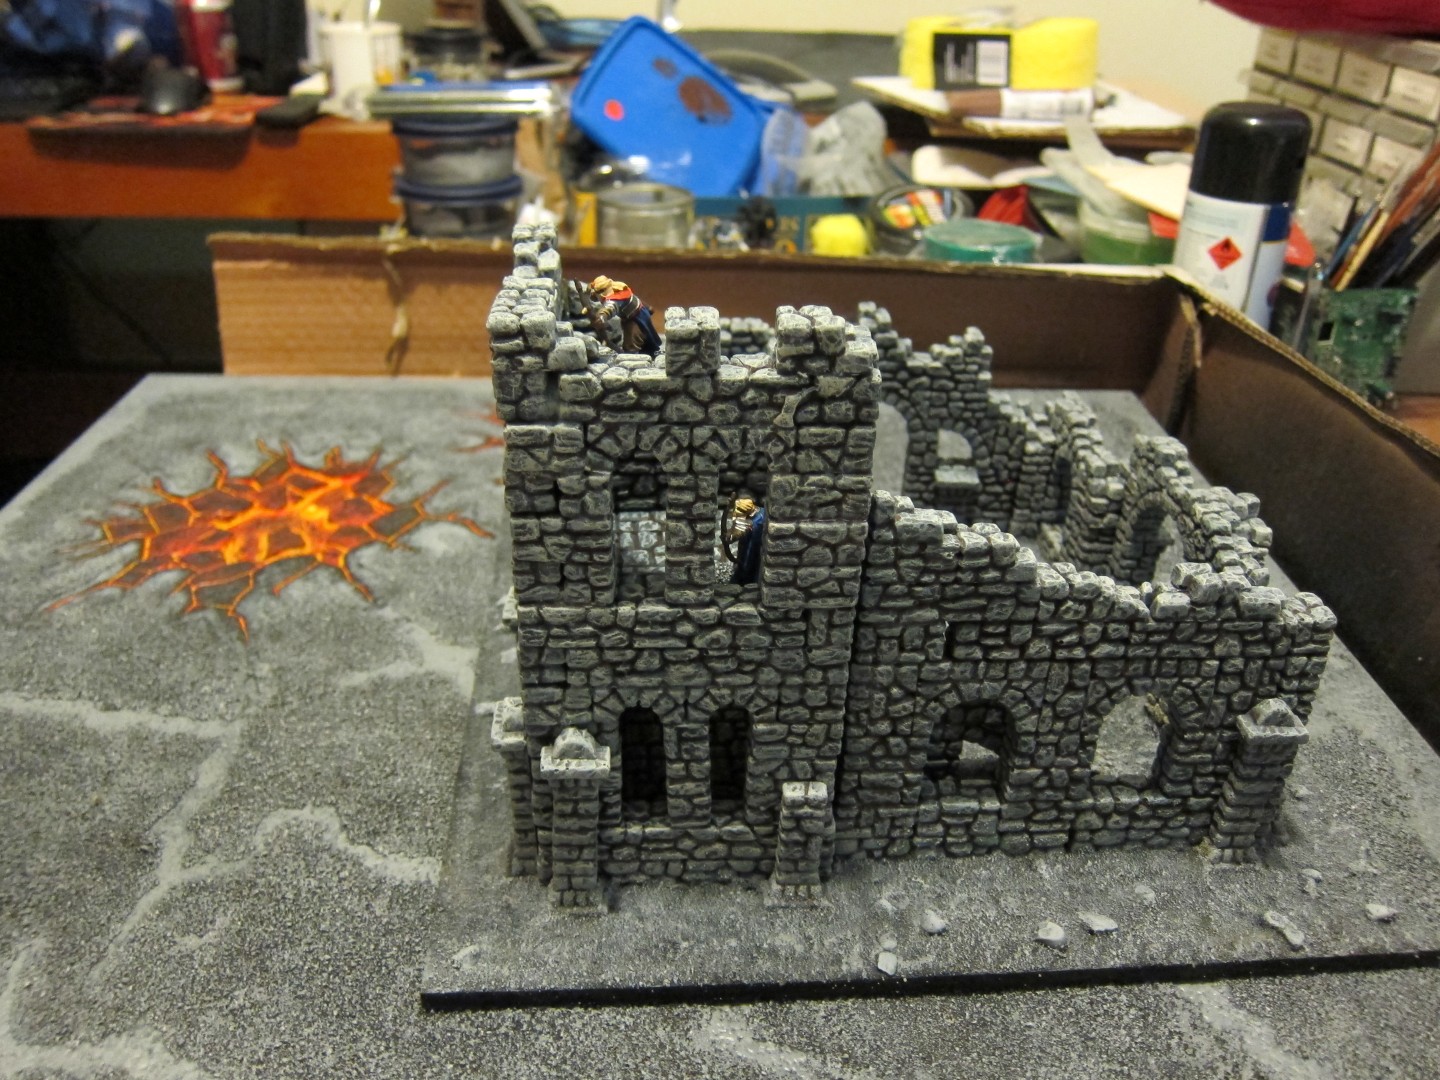
You can see a few more wall bits, some stairs and stuff added with some miniatures as I was so excited by this stage!
But after that was dry it was a simple matter to do a bit more drybrushing, glue in a vine and ta-da! Finished! It took me a long time, but that's because I haven't got too much hobby time at the moment and because in this weather each coat of paint or application of glue took about a day to dry!
Here are some shots from different angles. Stairs help archers access the top levels.
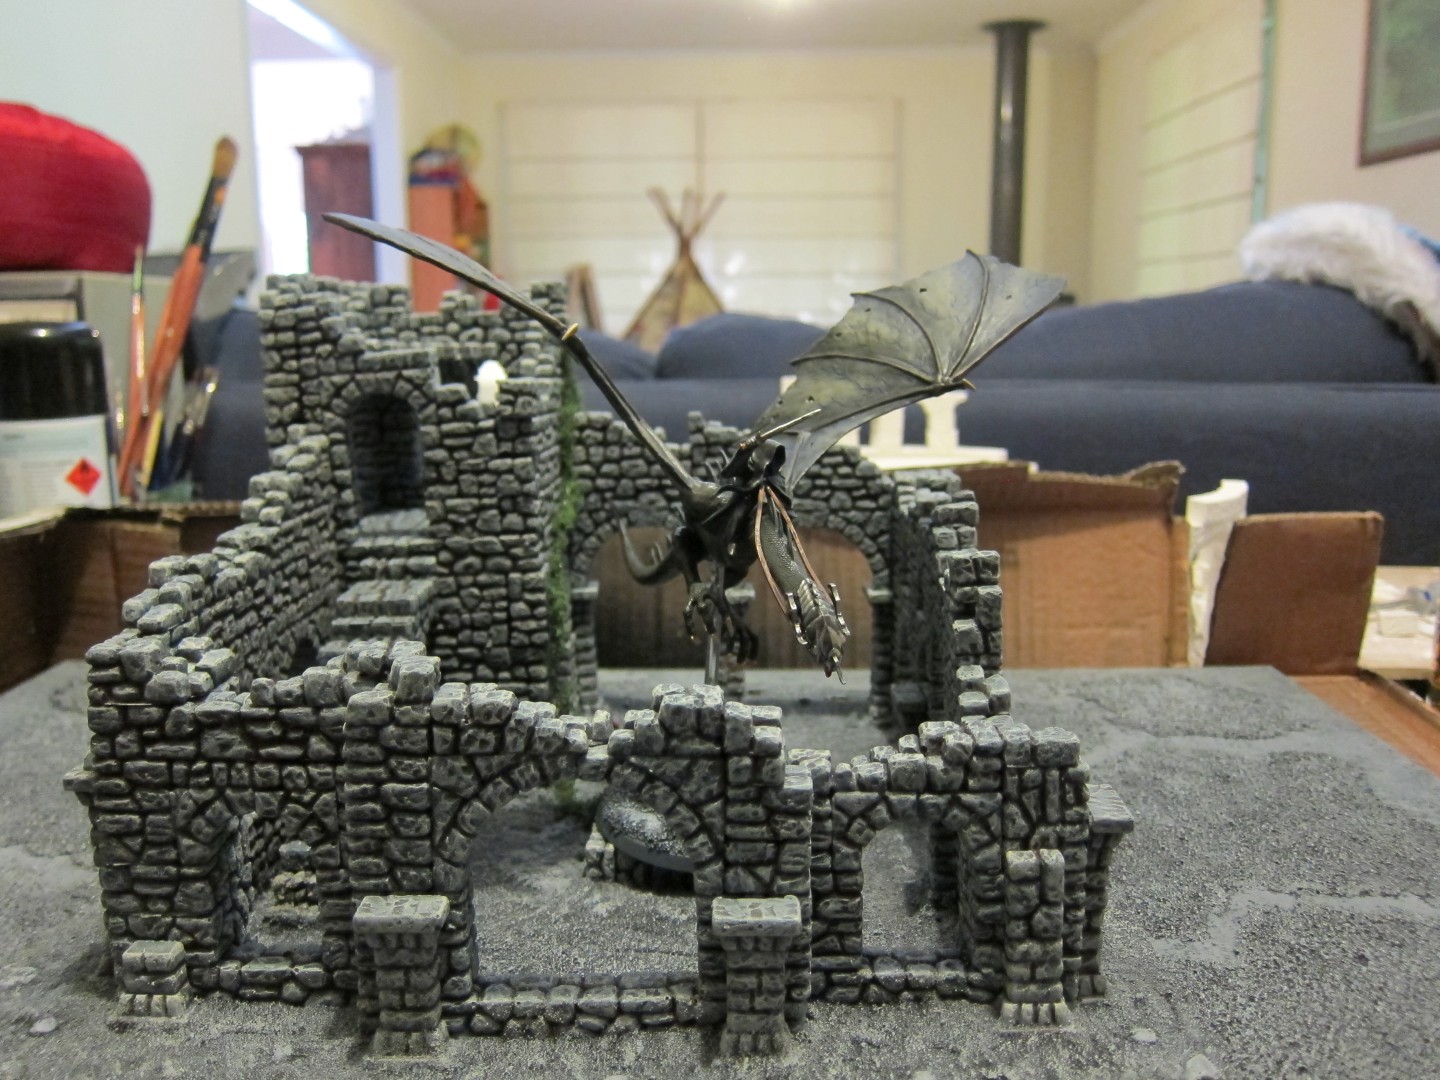
The troll is pretty big, but could get in through the big archways.
I think the bottom fits in well with my board, though I may need to "grey up" the very edges.
Oh, and there was a large hole for some reason in one spot, so I decided that my Ruined Fieldstone Tower needed a permanent resident, Rattus.
I tried to make it so that some of the crenellations on the top were only partly ruined. This lets archers still pose nicely and look a bit castley from some angles, giving a hint of what the unruined structure may have once looked like.
Similarly for this side, you can see that the central tower on this side isn't too ruined compared to the rest of the building.
Oh, and for 40k players out there, the keep still looks pretty cool =)
This shows the vine in a bit closer detail.
And perhaps a wraith makes this place home for the weekends?
Anyway, there you go! I had a great time building it and look forward to doing more!
For those interested the details are:

.JPG)