Hi all,
Welcome to another Lord of the Rings Strategy Battle Game (LotR SBG) Battle Report.
After forcing my brother to take control of the goblins last time so that I could face them with my dwarves, it was his turn to choose a scenario.
Having recently started re-touching and basing his Haradrim (http://paulslotrminis.blogspot.com/) he was wanting a chance to face a large horde. Where better to look for a horde than my goblins!
The scenery for today is a Citadel Battle Mat over the top of my Realm of Battle Board which works quite well. Most of the other scenery is my brothers, so feel free to browse his blog for more details on where he gets it all from.
His words:
"Well, I wanted to see how many goblins I could squash under the feet of the
Mumak, so for this scenario, my aim was to capture three objectives with
cavalry, heroes, and a wall of watchers backed by spearmen. My Mumak would step on row after row of goblins, and they would flee! "
He's now got enough guys for a full 1000 points, and wanted to fight a horde, so I opted out of the balrog, but still managed to get 98 models out on the table!
So without further ado...
Druzhag the Beastcaller and Durburz the Goblin King hate each other, like, a lot. So when some ruins were found at the outskirts of a forest it looked like the time was ripe to work together to capture a lair that Druzhag could use, allowing Durburz to keep the underground caverns all to himself.
The only problem? The ruins are quite close to a Haradrim city. They will need to work together so that afterwards they never have to see each other again!
With supernatural ability, the Betrayer has learned of the goblin plan and urges Suladan to stop this evil alliance, for his own nefarious reasons no doubt - or perhaps the evil Nazgul just enjoys the bloodshed. In any case, the Haradrim army arrives at the same time as the goblins and Turn 1 ensues...
Turn 1 - Priority goblin.
Druzhag urges his beasts towards the southern end of the ruins, Jornik the Goblin Captain leads a large contingent towards the central ruins and Durburz heads towards the north. The Haradrim split into two main forces, the Betrayer and Hasharin towards the north, the Mumak and Suladan towards the south.
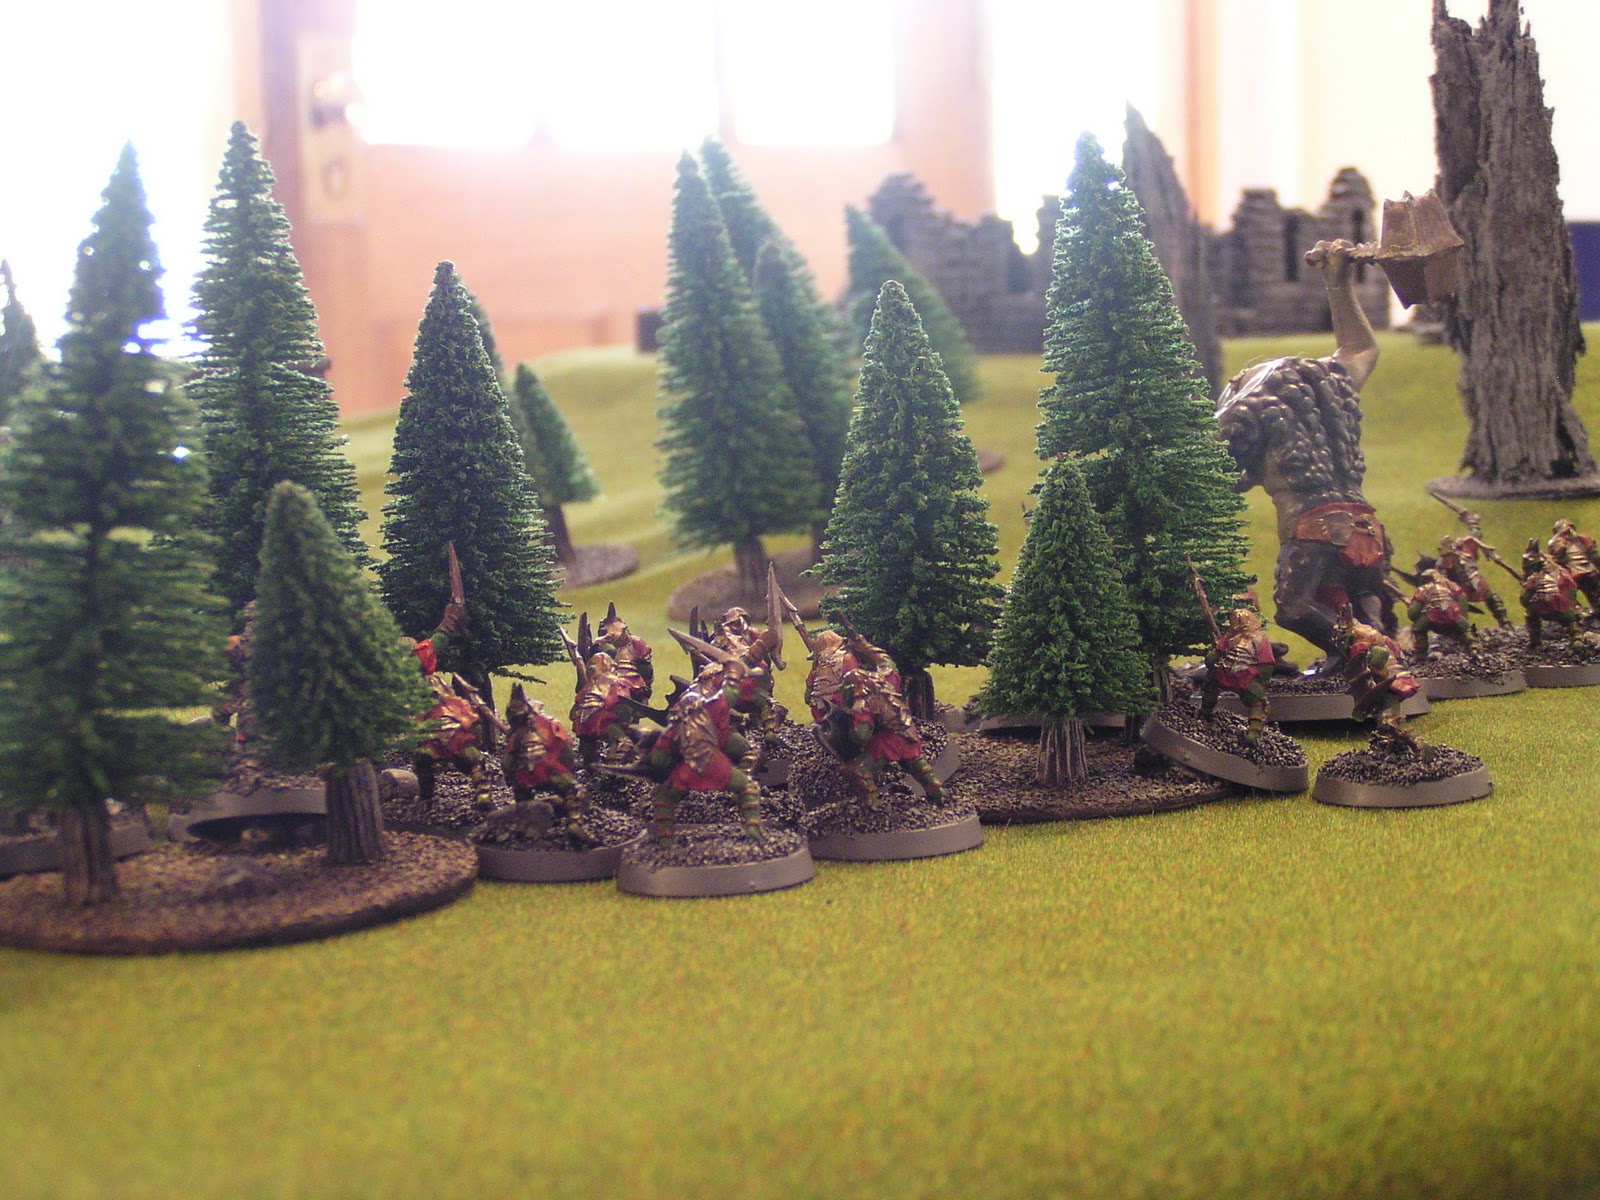
Goblins swarm through the trees, the cave troll looming almost as tall as them...
Turn 2 - Priority Haradrim.
The giant spiders scurry over the walls and into the southern ruins, clambering over any surface, regardless of angle and chittering loudly and defiantly at the galloping humans. The Mumak strides forward, huge feet causing small rockfalls on the steeper slopes and shaking the ground.
Acting as a mobile archery platform, with incredible line of sight, the Mumak is hard to fire from because of the lurching, yet the Haradrim archery is legendary and arrows fly swiftly and true, felling a wild warg through a gap in the trees! First blood of the match!
Retaliating, goblin archers volley high into the air, two arrows are on target, one sticks harmlessly in the howdah, the other is easily deflected by the chieftain atop the great beast.
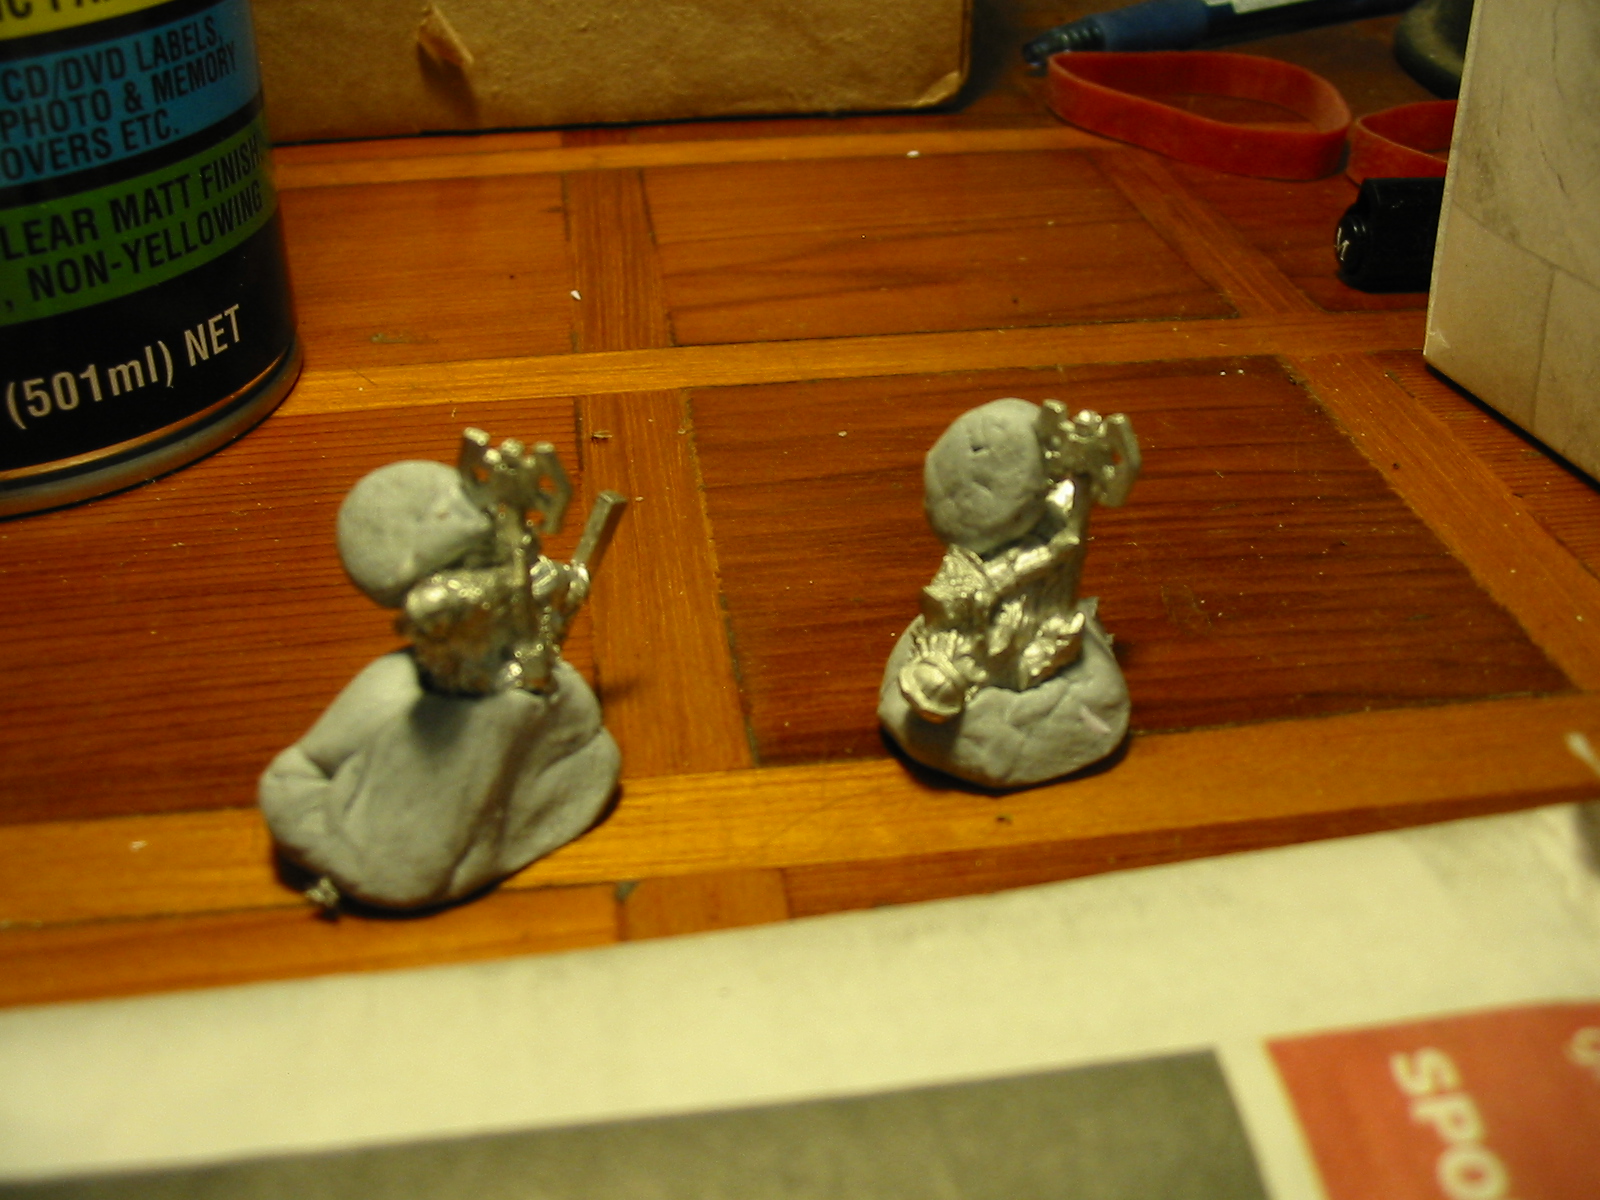
Since nothing else really happens this turn, I've had some questions about how we take our photos. My brother has a nice camera and a tripod, so we basically just use that. We always use the timed shot as any vibrations when taking pictures of such small miniatures causes blur.
To get the camera to focus in the right place it's my job to hold a piece of paper where the camera will focus - here's an accidental shot from the last game:
The paper serves to block the camera from focusing on it's preferred distance (the background) and lets us choose better where it focuses. (Obviously using the timer helps us to move the paper away before the camera clicks... usually.) It's one of those cameras where you hold the button down halfway, then the camera focuses, then you push the button the rest of the way to actually take the shot. Anyway, hope that answers a few of the questions.
Tripod - timer mode - paper - button half down to focus - click camera - remove paper and wait for timer to take shot - have drink in meantime.
Yes, we spend as much or sometimes more time taking photos than playing, but they make a great record of the game and it's quite fun to go over them afterwards!
Turn 3 - Priority Haradrim.
The Hasharin and Betrayer lead their group of Watchers of Karna and spearmen towards the northern ruins, with a horde of goblins emerging from the trees... Durburz points at the Hasharin and gets some spear goblins to poke the troll in that direction.
The Mumak continue moving forward, the Haradrim archers on top shoot into the southern ruins, with clear sight from their high vantage point. A spider is peppered by arrows and tries to climb the wall, but the fast acting poison on the arrow-tips spreads through its body and soon all of its eyes glaze over and it falls twitching to the ground. (He rolled 1s to start with to wound, but the Haradrim poison arrows let him reroll, and next time he did much better!)
Druzhag plants his staff in the ground and bats swirl around him as dark energies twirl upwards towards his dwarven skull trophies, but one bat flies too close and a wing tip twitches against the evil goblin's nose, causing him to sneeze. The dark energies fizzle and dissipate and the hapless bat is swiftly reprimanded... permanently.
Suladan has reached the ruins, but falls short of attacking the giant spider guarding the entry.
Meanwhile 24 goblin arrows rain down upon the Mumak, a few plink into the howdah or are easily deflected by the chieftain, no damage is caused. One of the goblin groups changes direction to cower behind a small rocky outcrop, not daring to expose itself to the stomping feet of the massive Mumak.
Turn 4 - Priority Goblins (tied on 6s but Haradrim had priority last turn).
Druzhag again begins the evil incantations, this time his attending bat swarm stay out of his way and a black swirling dervish surrounds him, flows up to the dwarven skulls and then a red lightning bolt smashes into the spider before Suladan.
Enraged by the pain of the evil magic, but enhanced in strength, the spiders eyes all glow red and it launches itself, chittering, at Suladan, who somehow miraculously fends off the majority of the fang and claw attacks, taking two wounds but not dying, even with the poisonous spider venom flowing in his veins. (It's such an awesome spell, sure, it might kill the animal it's cast on, but Suladan somehow survived five strength 8 attacks! I rolled lots of 2s, and I only reroll for poison on 1s - still I almost killed Suladan!)
Retaliating magic for magic, the Betrayer summons infernal darkness into a bolt of blackness that spears out and lances the troll through the chest. The troll, wounded, roars mightily and doesn't need any more goblin assistance to aim it towards the enemy. (The Betrayer used 3 will to help ensure a hit, on a 5+, using three dice is far more likely to get the result than just 1, increasing the chances from a 1 in 3 (about 33%) to 19 in 27 (about 70%)
The Mumak lumbers closer to the central ruins and the archers put their bows down and pick up chunks of masonry and rock that they have stashed in the howdah. From such a great height, the rocks are thrown and dropped towards hapless goblin skulls. Even with their great agility and shields, three goblins are crushed beneath the stone. (Spoiler alert - keep an eye on just how many of the goblin forces are killed by falling rocks, a doozy of an upgrade for a Mumak!)
Two volleys of 12 arrows each fly high into the air and fall around the Mumak, one arrow manages to slice through an important piece of cabling on the Howdah! (Rolled three sixes to do that!) It will still take four more cables to snap to cause any real instability, but the Haradrim look nervous now.
Turn 5 - Priority Haradrim (tied on 1s, but goblins had priority last turn).
The Betrayer, Hasharin and Chieftain all head towards the northern ruin, while the watchers and spearmen change direction and move towards the center. Suladan and his riders also change tack, heading towards the middle of the battlefield.
As the troll races towards The Betrayer, the evil Nazgul whispers in a dark and evil language and thrusts his sword out, black magic spearing out and into the other side of the cave troll's chest. Although the wound appears superficial, with a raised voice, the black figure raises his hands to the sky and the black magic spear seems to pulse, severing an artery. (Three will to hit and a might to ensure a wound.)
In retaliation the troll whips his chain through the air, and it is a perfect shot... but seems to pass through the suddenly insubstantial figure, causing no damage!
On one side of the Mumak rocks are let fly again, smashing the brains (what little there are) of three more goblin warriors as the cowardly greenies run from the Mumak. If you click on any of these pictures you get a much better version (as I'm sure most of you know). In this one you can see the difference between the touched-up archer on the far right (with beard, highlights etc.) compared to the yet-to-be-touched-up others in the howdah. In the picture above you can see some of the new bases he's flocking them with, I'm sure you'll agree they're starting to look really good!
And the evil men on the other side of the Mumak, not to be outdone, take aim and shoot two of the goblin archers that have been volleying away.
In return the ten archers left shoot back, two arrows strike home, one catching in the ropes of the howdah but causing no damage, and one swatted aside by the chieftain. Another 12 arrows are volleyed from the other goblin archery club squad with similar results.
Turn 6 - Priority Haradrim.
The Betrayer, sensing the approaching goblin horde, backs towards the center ruins, then turns, summons more evil darkness and using all his might sends yet another black dart of doom at the cave troll, this one (finally) pierces the troll's left eye and lodges in its brain, minutes later, the massive beast topples to the ground dead. Goblins scatter to provide a less dense stamping ground for the Mumak. Another mass of falling rocks from the howdah kill another goblin, the others all missing or quickly dodged by the nimble goblins.
In the center of the board, goblins have packed into the ruins as tightly as they can. A watcher, with a spear for support, launches a fury of dagger thrusts at a shielded goblin. Blocking with all his skill (which turns out not to be much), the goblin dies to a lucky stroke from the watcher (banner reroll) through his scrawny green neck, spraying blood over Jornik the goblin captain.
The Hasharin charges into combat and hurls a dagger, narrowly missing his goblin foe. Goblins then swarm around the evil men...
The Hasharin is faced by Lurnik, a goblin captain. Even his many battles with the dwarves only serve to help him not die to the skilled assassin, who slides a sharp bladed dagger through a gap between shield and chainmail, causing a bleeding wound, though not a fatal one.
The human chieftain is beset upon by Durburz, the goblin king, three goblins with shields and four spear supporting goblins. Swinging his long bladed spear in a mighty, massive arc he causes all the goblins to fall backward, almost tripping over the still twitching troll corpse, and opening a gash in Durburz's leg. (Uses a might to win the battle - wins on tie re-roll and uses another might to cause the injury.)
Turn 7 - Priority Goblin.
Backing into the ruins, Lurnik takes up a defensive position inside the ruins, Durburz and his troops surround the human chieftain that wounded his leg (as well as his pride). Racing from the central ruins, suddenly a group of watchers and human spearmen attack as well! A messy melee is fought.
The Hasharin quickly dispatches the goblin that threw itself at him to tie him down. Durburz faces a watcher and a spearman and uses a mighty blow to force them back, but the agility of the black-clad human saves him from any serious wound.
Another watcher and spearman combo quickly take out the speargoblin that was aiding Durburz.
The human chieftain is still overwhelmed, despite the assistance from the watchers, and falls beneath five goblins and their stabbing short blades! The exclamation mark is because this is the first human death this game (with 15 deaths on the goblin's side)! The scenario calls for a test to be made when one team breaks (49 dead on the goblin team or 15 dead on the Haradrim team) if a 1 is rolled the game is over and whoever controls the most ruins wins. Next turn a 1 or 2 is needed, then a 1, 2 or 3 etc.
The Mumak turns towards the pestering archers and with arrows and rocks, the men atop the howdah manage to bring down one of the scattered goblin archers, bringing this group to 9 and stopping any future volleys from them.
One retaliatory arrow actually manages to stab towards the chieftain accurately, but fate is on his side and a random twitch of leather strapping deflects the arrow enough to slice a cut across his arm, but cause no real harm (lucky fate save!). The arrows from the other goblin volley do nothing save add atmosphere to the experience.
In the center of the ruins, The Betrayer focuses his gaze on Jornik, who has taken position in the entrance to the ruins. Jornik is fortunate and just as he is beginning to fall under the Nazgul transfix spell, he snorts a fly up his nose and coughs and splutters.
Just to the south of the central ruins Suladan urges his mount forward along with several of his raiders. This initial attack results in Suladan dispatching a hapless goblin spearman, long sword slicing the goblin's head clean off, but the other goblins manage to defend themselves against the men on horseback.
Turn 8 - Priority Haradrim.
Suladan and his raiders charge into the goblins, horses bowling over four goblins, and four goblins falling to war spears in various painful locations. A great result from a well-timed charge! (Suladan won on a tie and killed three goblins in a single great blow!)
Behind Suladan, a watcher has tried to enter the ruins by the side opposite Jornik. The goblin on duty there raises his shield, deflects the watcher's sword strokes, blocks the spear thrust from the watcher's friend with his sword and watches in glee as HIS supporting speargoblin thrusts a spear clean through the man's chest, cackling as blood sprays back over the spearman behind.
No lucky fly for Jornik this time, The Betrayer summons up more willpower and this time his gaze sticks, transfixing Jornik completely. Unable to fully concentrate under the spell of the Nazgul, Jornik is only saved from death by his trusty back-up spearman.
8 arrows from the Mumak, which has turned back towards the center, flash into the ruins, slaying a goblin spearman with poisonous arrows. In retaliation, the other goblin archers (9 direct fire and another volley) manage to saturate enough fire to get an arrow thwacking into the chieftain's upper arm, a wound that will cause him to have difficulties putting his hands up in the air like he just don't care for the rest of his life.
Towards the northern ruins, the messy melee continues. Durburz and two goblins take on a single Watcher of Karna and bring him down, Durburz's jagged sword ripping a messy trail through the chest of the man. Behind the dying watcher, his comrade forces back another goblin duo, and kills one of the green-skinned fighters. The other combatants thrust, parry and separate, no lasting damage caused.
But where did the Hasharin go? Racing off towards the goblin archers! Finding them pre-occupied with peppering the Mumak, he charges in, felling two of them without breaking a sweat!
Turn 9 - Priority Haradrim.
The Mumak lumbers closer to the central ruins, bringing the guarding goblins into rock throwing range. Two rocks crush the skulls of more goblin defenders, sending others scattering and scampering for cover. As seems usual, masses of goblin arrows clatter around the howdah, doing no actual damage.
The Betrayer summons up the last of his evil willpower and pierces Jornik with a black dart before fading, laughing, into the void to replenish himself and put together still more evil plans.
Heedless of his wound, the braver than average goblin Jornik lashes out in pain and fury at the watcher in front of him, bringing the human down where he is finished off by a spearthrust from a supporting speargoblin.
Why were there less arrows clattering in the howdah than usual? The Hasharin charges towards the northern archers, throwing dagger flashing through the air to stick in the throat of one hapless goblin while twin blades bringing another two of the lightly armoured goblins down, dead as assassinated goblins.
Meanwhile, Suladan and his raiders charge into the previously charged goblins, the horsemen dispatching three more goblins with hoof and blade. Only the bow-armed raider is unlucky enough for his horse to stumble, throwing him directly onto the upraised spear of a very surprised goblin (who for the rest of his life cheered about how awesome his spear-skills were - a time period measured in minutes).
As turn 9 came to an end, my handy little check-list of dead figures came to 32 deaths on the goblin team for 6 deaths on the Haradrim team! Although the goblins held the objectives, there was no doubting who was dominating the actual battling!
Turn 10 - Priority Goblin.
More rocks from the howdah rain down into the ruins, slaying a goblin defender. The goblin arrows fly through the air again, and with another incredible stroke of luck, another cable is sliced on the howdah. Another three hits like this and the Haradrim on top the Mumak will be getting a goblin's eye view of the great beast. A watcher with spear support tries to force his way into the ruined building, but cannot get past the mass of goblins infesting the place.
The Hasharin turns from the scattered goblin archers, who have run every-which-way and pulls out his blow-pipe. A poisonous dart flashes out into the exposed thigh of Lurnik, seconds later he turns even greener than before, then slumps to the ground, writhing for a minute before finally lying still.
Suladan's raiders are less fortunate this turn. The Serpent King himself slays a jubilantly exclaiming spearman. A raider is brought down by a two goblin combo, the other men hold their ground, but cause no wounds to their opponents.
Turn 11 - Priority Haradrim.
Druzhag, alarmed by the rock-induced carnage at the central ruin, unleashes some of the southern defenders to circle around behind the Mumak, hoping that the Mumak won't unleash any rappelling Haradrim. Suladan kills another two goblins as he charges at them with his mighty steed. Four arrows thwack into the chieftain atop the Mumak, but none of them penetrate his armour (I rolled three 5s, but needed 6s!)
Jornik, who has resisted a Nazgul, slain watchers and snorted a bug is finally brought down by a mass of masonry from the Mumak. A simultaneous assault on the other entrance by a watcher brings down a goblin defender, suddenly the central ruin is looking far less well defended!
In the north the Hasharin brings down a goblin defender with a throwing dagger as he charges at the entrance to the ruins. Although he faces six goblins, the sublime spins and slashes of the assassin wins out and a goblin falls dead. The spearman giving him support ignores the arrows from the goblin archers as they clatter around him against the brickwork of the ruins.
Turn 12 - Priority Goblin.
Unwilling to let the goblins regain their composure, Suladan gives out a loud battle cry and calls a heroic move, charging the few remaining goblins to the east of the central ruins. Between him and his fellow raider, the last three goblins there fall, never to rise again.
More rocks from the Howdah kill goblins in the ruins as the Mumak smashes an ancient pillar to achieve a better firing angle. Goblin arrows rain around the place, but thwack harmlessly into the thick hide of the Mumak or tear holes in the Howdah cloth. The watcher at the ruins kills another goblin as he tries to gain a foothold inside the ruins.
The Hasharin fights off another lot of goblins, seemingly unending green bodies filling his view. Arrows fly at his spear support, but again they clatter around him without causing any damage.
Turn 13 - Priority Haradrim.
Suladan rides to the central ruins and dismounts in the doorway. More rocks from above smash another three goblin bodies. A watcher forces his way through the other entrance and slays a goblin, ignoring the spear-thrusts of the rapidly diminishing enemy!
The warg-pack is almost within striking range to the rear of Suladan's remaining comrades.
To the north, the Hasharin's wonderful run of constant kills finally comes to an end as six goblins stack on, bearing him to the ground as Durburz, having slunk around the ruins, slays his spear support.
The goblin force is broken!
A die is rolled... it's a 1, the game is over! The goblins win a major victory!
Just for fun we rolled to see how many goblins would flee next turn. Durburz rolled snake-eyes and had to use his remaining will and might to keep him and his nearby goblin warriors in the fight, elsewhere across the battlefield 16 more goblins ran!
The final dead stack of guys...
Lol, slightly more goblin casualties than Haradrim (and as my brother pointed out, The Betrayer wasn't actually killed, so I only actually killed 8 guys for my lots and lots!)
My strategy at the first was to just swarm over the objectives and I think I did that pretty well! The troll was a bit of a fizzle out, not doing anything before being killed by the evil magic of the Nazgul. There's no way I could have held out for much longer, not with the massive attrition you get with a broken goblin force, so I'm really glad I rolled a 1 to end the game!
I don't really feel like I won, since another couple of turns would have turned a victory into a defeat, but I'll still take it =) The piles and piles of dead goblins kinda spoil any cheering there!
The remaining goblins forces:
My brother's concluding remarks:
"My aim of stompy conquest didn't turn out exactly as planned. It took a turn
longer than I had hoped to get the Mumak to the middle of the table, but a mass
of goblins were able to put a pillar between me and them, and the other goblins
ran up onto a hill. Meanwhile, my infantry forces were manoeuvering about the
board, but when I saw I could not trample the goblins in the middle, I changed
direction for the Watchers, and headed to try and take hold of the central ruin.
Since the goblins could move straight through all the terrain features, they
managed to get into the ruins before me, and with the masses and masses of
goblins and monsters, managed to hold on. Once I realised how much fun it was to
drop rocks on goblin heads, I turned to a new tactic, which was to bombard
goblins, and clear out a ruin so my guys could move in. While the tactic didn't
achieve victory, it was sooo much fun squashing goblins in every direction!
In the end, though I didn't gain hold of any ruins by the Game Over, I managed
to greatly tip the casualty ratio between our forces. It was very fulfilling
counting up how many goblins would be removed from the board each turn :) I
really enjoyed black darting the Troll with the Betrayer too. I'm not sure if
I've killed him in a Haradrim battle before!
I expected my Mumak archers to get shot down like they usually do, and my
cavalry to get knocked off of their horses, but die rolls really went my way in
those areas this match. I think if we did this again, I would ride my cavalry
into the middle ruin right away, and park the mumak beside it, squashing anyone
who tried to take the ruin, while betrayer, hasharin, watchers and infantry,
took a second ruin as a single force."
And the remaining human forces:
Another question I'm often asked is how long the games take. Well, this one was a looong one, about five hours. That includes the actual setting up, writing down of the stats to keep track of wounds etc., snacks, lunch (you've probably spotted food on the table in some shots), photos, packing up, oh, and the game itself. And this 1000 point battle is the largest we've had. Each turn is actually pretty quick, it's all the stuff in between that makes it take longer. But we always plan on making a day of it, so it's all combining to part of the fun.
Anyway, there you have it, another LotR SBG Battle Report for you to laugh at our mistakes, but hopefully get a sense of the whacky fun that the game is!
Due to more baby preparations etc. there probably won't be a game next week, but we'll definitely try to have another one the week after, so stay tuned!
Thanks for all your positive comments here and on the forums, really appreciate it, and PM any questions if you have them, happy to help when I can!