Saturday, August 15, 2020

Scouring of the Shire - 5 The Southfarthing

We actually played this last week, but I'm only just getting to it today, sorry! With all that's going on at the moment, sometimes even just the thought of doing this upload is too much to handle.

Today we actually played a battle companies game, but totally forgot to take any photos. Just as well as my son thrashed me completely!

Anyway, on to the Southfarthing. Right from the start I had a huge advantage. There are five objectives in play, I get to start with three of them! I also had Farmer Maggot thanks to a previous mission. In this mission any casualties can still come back on a 1 or a 2, because Oscar won the storehouse mission previously, he gets to come back on a 1, 2 or 3. We play until there are eight casualties at which point the game can be over on a 1 or 2 on a D6.

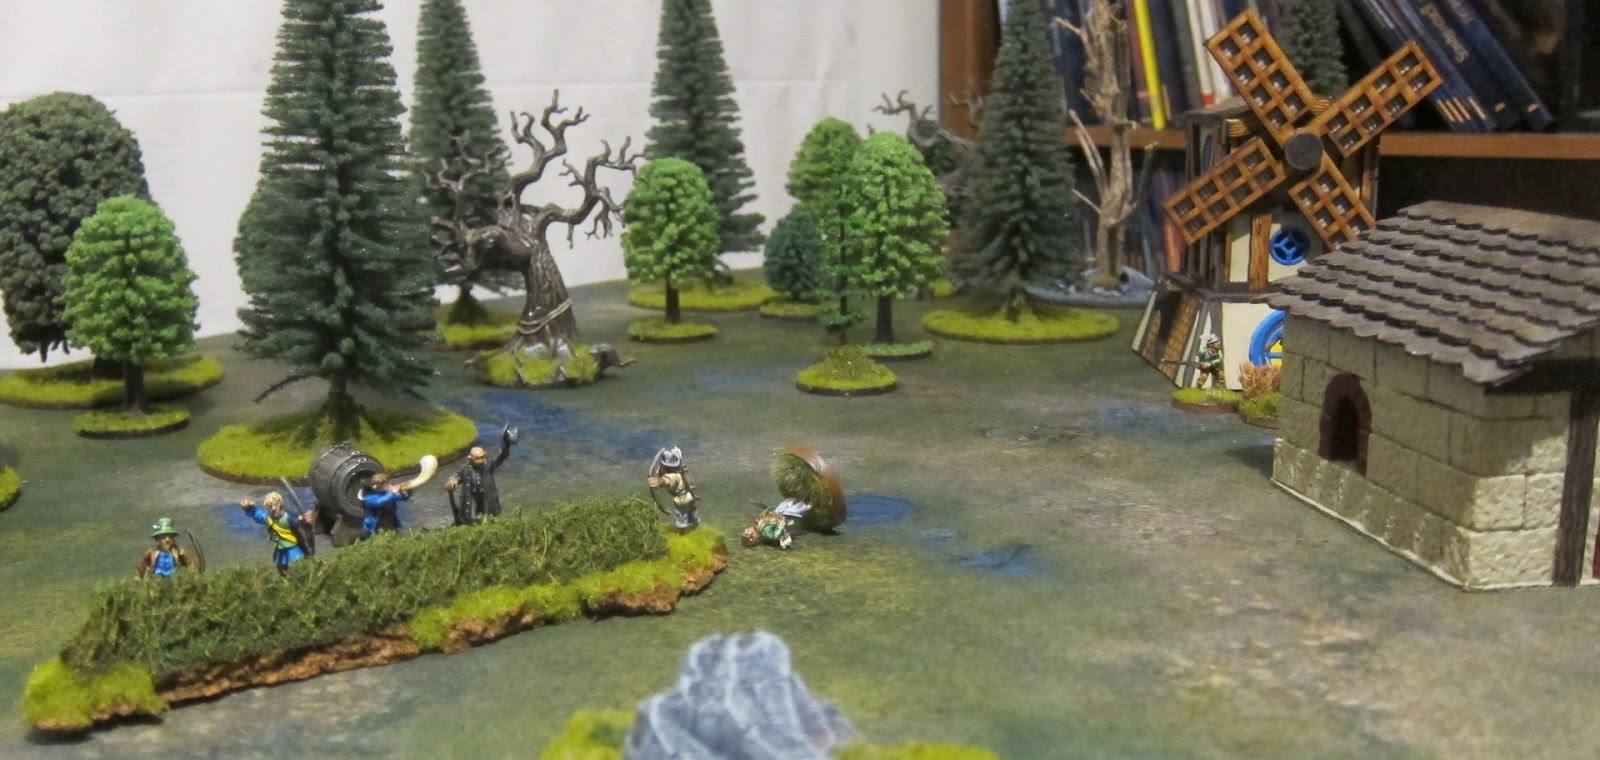
Firstly, check out some of my new scenery. Some mdf put together stuff that just needs a little assembly and painting up (maybe I'll show some of the other pieces in another post) but now we have a cute little windmill with round doors and windows just like Hobbits should have =)

So Oscar charged forward and my archers immediately took down one poor guy.


On the next round the ruffadrim came right back on, choosing to make a sneaky assault on the objective behind the inn. The D8 you can see there is tracking guys I've taken out (hence the 1 in this picture).


Farmer Maggots trusty hounds are heading towards the ruffadrim down near the chest.


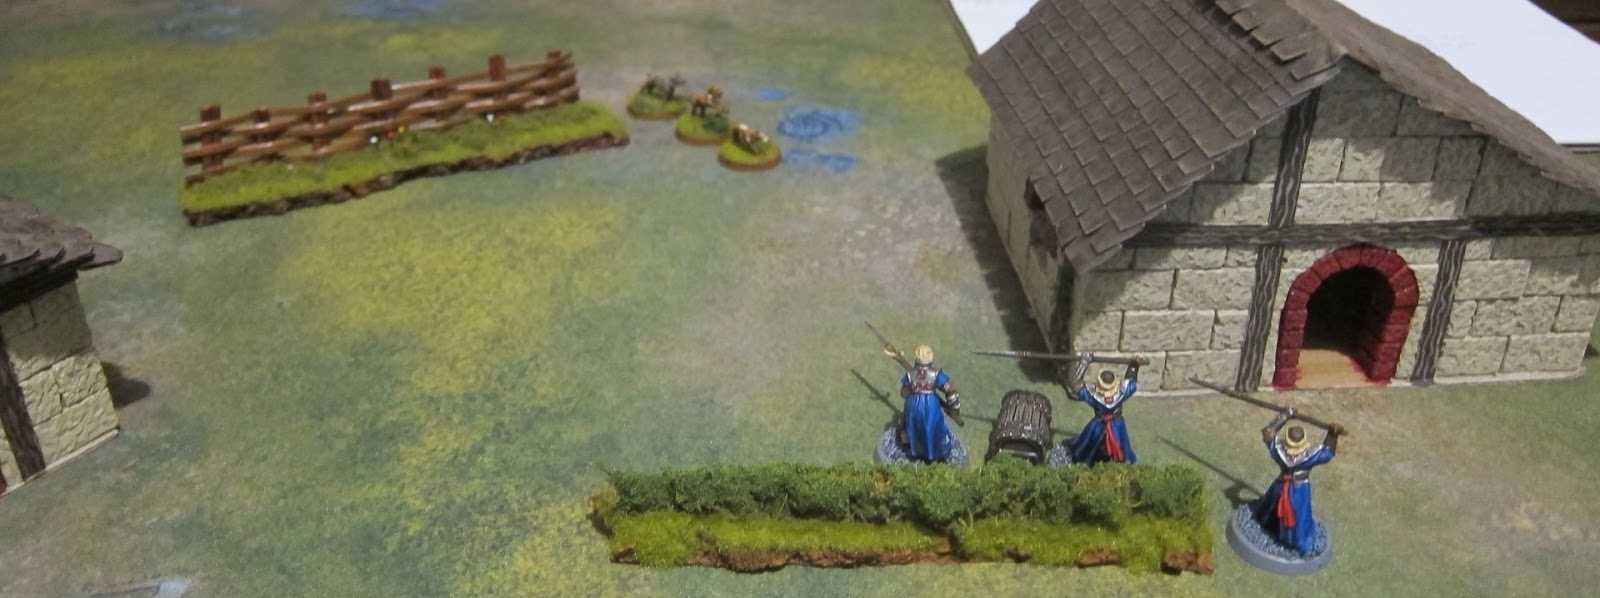
And you can see quite a few archers spread around, with other guys guarding different items.


The hobbit shooting takes out one of the ruffadrim archers...


As well as another incoming close combat troop!


And then another archer! In the back right you can see some Shirrifs coming to help the dogs (they're just half the speed!)


And Paladin Took himself charges into the fight and uses a point of might to help win.


It's really not gone well for the ruffadrim, with seven casualties already, most of whom have come on the same side, but have not reinforced luckily. They have managed to take out a hobbit here...


And a hobbit there...


But with just one casualty able to be taken, these three guys are about to get ganged up on big time!


But these hobbits are now getting surrounded by superior fighters!


And another hobbit goes down!


But so do more ruffadrim...


And a growling dog seals the deal and the game is over, the ruffadrim were catching up at the end, but it was too little, too late and the hobbits win!


This mission seemed unfair at first, but as soon as the ruffadrim started getting more into the combat, the hobbits started dropping, it was just as well we ended when we did as I think the tide would have well and truly turned in the next couple of rounds.


Sunday, July 26, 2020

Scouring of the Shire - Episode 4 - The Store House

In the midst of a farmstead is a storehouse full of all the goods that the ruffians have stashed away. The hobbits are sick of the thievery and are planning to break in, grab some beer and pipe-weed and whatever else they need for second breakfasts.

There are three ruffians sleeping in each of the small dwellings and two sentries at the storehouse. Twelve hobbits (six from each corner) are going to try to sneak to the storehouse then back off the table again. If they are seen the alarm is raised and the other ruffians will come yelling out!


Here's one group of hobbits, including my new guy blowing a smoke-ring which I'm particularly fond of! There are some traps right in the corner, so if I can get in, get the loot and get back to the corner I may be in the clear! Of course, with 4" movement, that's easier said than done!


Well... the hobbits get within ten inches of the storeroom and I say the fatal words "this'll be fine unless you manage to roll a 6!" No surprises, a 6 is rolled and the jig is up! Out come ruffians as the hobbits run in and try to make a break for it!


Only one ruffian is at the north east corner and he quickly engages a hobbit as the others swarm around him to grab stuff!


A very lucky Shirrif bonks a ruffian on the head as he races past (in this mission the ruffians are knocked down and on a 6 they can recover - but what are the odds of that happening!?)


The north-east hobbits are now all carrying stuff, but there's still a ruffian harassing them.


Down to the south west the hobbits are already on their way back, but there are ruffians everywhere!


It's looking good for the hobbits at the north east side, but there's another ruffian just behind that northern fence!


Hobbits are being knocked down and sent to the lock-holes in the south, their short legs just not allowing them to outrun the ruffians!


And in the north the brave hobbits have met their matches as two more here are arrested!


So far only one ruffian has stayed down that was knocked down, but another Shirrif falls as only two more hobbits are left in the south.


And with that the hobbits are broken and the mission is a failure!


Phew, what a mission, there were hobbits running everywhere, ruffians intercepting them and in one turn there were four successful hobbit-whippings! I shouldn't have taken that initial gamble as I reckon one more turn advancing carefully would have helped a great deal.

So far the hobbits have won 3 of the 4 games, but they seem to be getting more difficult for the little folk!

Saturday, July 11, 2020

Scouring of the Shire - Part 3


The third episode of the scouring of the shire is the Brockenborings. A secret meeting is being held by Lobelia and Fatty in a remote hobbit hole. They were all having a lovely time, Fatty and Tippers were enjoying the drinks while the others were talking about the encroaching ruffadrim. Suddenly they hear a loud bird call from the nearby forest, that's a signal that there are incoming baddies!

In this mission, the hobbits all have to scatter - run off a board edge, while encircling ruffadrim as well as the evil Sharkey and Worm try to capture them. However, because the hobbits won the last mission, after setup they can move D6 figures. So originally they were all evenly spaced around the hobbit hole, but then I rolled a 6 and moved six of them all over to one side. So instead of scattering in all directions, with ruffadrim all over the place, I now only have about two ruffadrim to get past - seems almost unfair!


The hobbits all bolt for it!


Except Tippers who has had slightly too much to drink and just wanders around outside the hobbit hole door.


A ruffadrim catches up with him pretty quickly (they move 6" while hobbits only move 4") but fails to wound the wobbly hobbit.


Another ruffadrim takes on two hobbits, but no damage is done except to slow them down a little. 


And as the clash continues the hobbits back him up against a fence and dispatch him! Meanwhile Sharkey is trying to cast spells, but is a little too far away!


In a bizarre twist, Tippers manages to knock out the ruffadrim attacking him!


Sharkey casts Immobilize on Fredegar and halts his escape, but there's still nobody close enough to engage with the hobbits.


Finally there are a few combats, Sharkey catches up and takes one hobbit prisoner, another ruffadrim beats back a hobbit, but with no damage done.


Worm is actually bested by Bookman, who clubs him with a massive hardcover tome!


And another combat causes the hobbit to back away, but he avoids injury.


Tippers just ambles right back to the hobbit hole, ready to refill his drink flask.


And after that the hobbits mostly get away! Lobelia, Fatty and six other hobbits managed to escape, we may see them again in a future episode =) These games are pretty fun, super quick and, so far, very easy for the hobbits. I reckon this one would have been TOTALLY different if the hobbits hadn't had the free rearrangement at the start. If they had still been spaced around the ruffadrim would have been able to catch up with them much more easily and Sharkey would have been able to get some more spells off.

At some point we might get the newer version of the book, but so far these have been good =)

Scouring of the Shire - Part 2

The second episode is even more ruffadrim trying to get through a forested area. The hobbits have been busy in this one, there may only be a few of them, but they have trapped the area! I made a whole bunch of traps. These are just miniature bases with grass on the top side. On the bottom, however, there are some that just have grass, some that represent pits, some that have trip wires and some that have snares. Pretty simple, you get close to one, flip it over and see if there's a trap. If there is you roll a die, on a 2+ something bad happens to you (not seriously bad, often it's more like it just ends your turn).


So there are traps spread right throughout this forested area. Again, the ruffadrim just have to make it from one side to the other.


Here's the first trap sprung! It's a trip wire! I roll a 1, nothing happens.


A-ha! Another trap! It's a pit! I roll a 1. Nothing happens. However, with a pit trap you either have to jump across it or go around it some other way. So one ruffadrim tries to jump it... and rolls a 1! He falls into the trap (ends his turn and next turn he climbs back out). As well as this, a hobbit stone bonks a ruffadrim on the head! Knocks him right out!


On this side of the forest another pit trap is stumbled into... I roll a 1, nothing happens. These guys are getting closer to the edge now!


An archer and two stone-throws knock out another ruffadrim, who uncovered a snare trap... then I rolled a 1 so nothing happened.


The ruffadrim have broken through the hobbit lines and are just about off the board, but a remarkable turn of archery and stone throwing takes two of them out, right at the last minute!


And on the other side of the board, more stones bonk into another ruffadrim, there are now not enough left to count a victory for the ruffadrim - hobbits win again!


This was another fun, though silly, game. It was super quick, another 15 minute game. There were 7 traps encountered and I rolled a 1 every... single... time! Still, it was fun and I look forward to seeing them in future games too! The poor ruffadrim are not faring well, don't underestimate hobbits with stones, they may only wound on a 6, but sometimes those 6s come up more than you'd like!

Scouring of the Shire - Part 1

Just for something a little bit different we found the old Scouring of the Shire book on eBay (there's a new one that we might splash out for one day). So we thought we'd have a go at these missions. 

So in the first mission, Farmer Maggot's Farm, we have some ruffians (we'll use our old ruffadrim stand-ins) who are trying to creep by on a stormy night. They have to get off the far board edge but in between is some farm land and three dogs, Grip, Fang and Wolf. They start off sort of randomly patrolling around, but if they spot any foes they bark loudly, which may wake up Farmer Maggot who will then enter the game.


We skipped a few turns here as everyone just sort of moved around, and here we are right near the bottom of the board, the alarm has only just been raised and the ruffadrim are almost already at the end! Looks like they'll easily win this one!


Except that the dogs are pretty awesome, and there's only a narrow gap without tramping through the fields (at half speed). One ruffadrim goes down!


And their barking has woken up an angry Farmer Maggot! Some of the ruffadrim break off to try and get around the back, while another falls to the dogs!


Finally the ruffadrim are reduced to two models, meaning they can't win the match, victory for the farmer (well, really his dogs!)


This game was super quick! With very few models and nothing to track like you do with battle company games we were done in about fifteen minutes, which left us time to do another...